Rainy days can spark a lot of emotions, especially when you’re thinking about how to make the most of the water that falls from the sky. If you’ve ever looked at those droplets and wished for a way to capture them, you’re not alone. The practice of using rain barrels is gaining momentum, particularly among urban gardeners who crave sustainable ways to conserve water. I created this guide because I believe that anyone can embrace rainwater harvesting, but it’s crucial to avoid common pitfalls during installation.
If you’re a gardener seeking to bolster your plant’s hydration without running up your water bill, this post is for you. Whether you’re a seasoned pro or just starting, these tips will help you successfully install a rain barrel while steering clear of mistakes that could hinder your efforts. You’ll discover valuable insights that not only enhance your DIY rain barrel setup but also promote sustainable gardening practices that benefit both your garden and the environment.
In this post, you’ll learn nine essential rain barrel installation tips designed to help you get it right the first time. From choosing the right location and barrel type to maintaining proper filtration and preparing for winter, these actionable tips will guide you through each step. Let’s dive in and make your rainwater harvesting dreams a reality!
Key Takeaways
– Choose the Right Location: Position your rain barrel where it can catch maximum runoff from your roof while ensuring easy access for filling and maintenance.
– Use the Right Barrel Type: Selecting a barrel made from food-grade materials ensures safe storage of rainwater, while also considering size based on your garden’s needs.
– Install a Temporary Overflow System: This helps prevent flooding or overflow during heavy rain, protecting your property and ensuring the barrel remains functional.
– Maintain Proper Filtration: Installing screens or filters keeps debris out of your water supply, which is essential for plant health and barrel longevity.
– Prepare for Winter: Winterize your rain barrel to avoid freezing and cracking, ensuring it’s ready to collect water when the rains return in spring.
1. Choose the Right Location

Finding the ideal spot for your rain barrel is essential for effective water collection. Look for a location that captures the most rainwater from your roof’s downspouts. Placing your barrel close to a garden bed makes it easier to hydrate your plants. Ensure the ground is level to prevent any tipping or spills.
Think about these key factors:
– Accessibility: Make sure you can comfortably reach the barrel for refills and maintenance.
– Sunlight: A shaded area helps reduce algae growth inside the barrel.
– Proximity: Position it near your plants to minimize the distance for watering.
Taking the time to choose the right location will save you effort in the long run, making your gardening routine easier and more sustainable!
2. Use the Right Barrel Type

Choosing the right rain barrel is crucial for successful water collection. Look for a barrel made from durable materials that resist the elements, like UV-resistant plastic, to prevent damage from sunlight. Consider a barrel with a secure lid to keep out debris and pests.
Here are some tips for selection:
– Size: Determine your typical rainfall and select a barrel size that meets your needs; larger barrels hold more water but take up more space.
– Design: Pick a style that matches your garden’s aesthetic, whether modern or rustic.
– Features: Look for barrels with built-in spigots or overflow valves for easier use and maintenance.
Investing in the right type of barrel will ensure your rainwater harvesting system works effectively for years to come!
3. Install a Temporary Overflow System

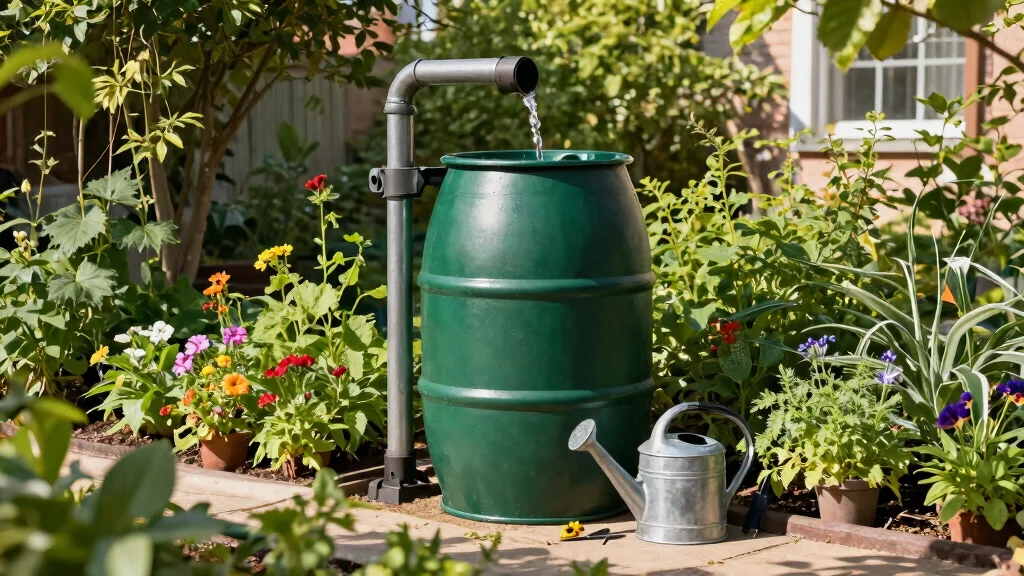
Managing excess rainwater is vital, especially during heavy downpours. Installing a temporary overflow system helps direct any overflow efficiently. You could simply channel excess water back into a nearby garden bed or create a soakaway area.
Consider these aspects:
– Configuration: Ensure the overflow pipe directs water away from your home’s foundation to avoid flooding.
– Material: Use flexible tubing for easy installation, allowing you to position it as needed.
– Testing: After installation, check your overflow system by simulating heavy rain or waiting for a storm.
A well-planned overflow system utilizes excess rainwater, enhancing your garden’s health without wasting resources!
Overflow is just extra water, waiting to feed your plants. With smart rain barrel installation tips, a simple overflow hose keeps foundation dry and your garden thriving—turning a downpour into a thriving, low-maintenance water source.
4. Secure Your Rain Barrel

Keeping your rain barrel secure is essential to prevent it from tipping over or being disturbed by animals. A stable base is key, so consider constructing a platform using bricks or wood to elevate it slightly for easier access.
Practical steps to take include:
– Anchor: Use straps or brackets to secure the barrel to a nearby fence or post.
– Weight: Partially fill the barrel with sand or gravel to add stability.
– Location: Avoid placing it in busy areas to reduce the chance of accidental bumps.
Securing your barrel not only protects your investment but also prevents spills, keeping your garden tidy and efficient!
5. Maintain Proper Filtration

To ensure your collected rainwater remains clean, maintaining proper filtration is a must. Over time, leaves and debris can clog your system, so installing an effective filter at your downspout is a wise move.
Here’s what to do:
– Gutter Cleaning: Regularly clean your gutters to prevent debris from entering the barrel.
– Screen Filters: Use mesh screens over the intake holes on your barrel to catch leaves and insects.
– Routine Maintenance: Inspect the filter monthly during rainy seasons and clean it as necessary.
With proper filtration, your rainwater stays pure and ready for your garden, supporting healthy plant growth and efficient water usage!
6. Monitor Water Levels

Regularly checking your rain barrel’s water levels is vital for effective conservation. A clear barrel or a marked gauge can help you see how much rainwater you have available.
Consider these practices:
– Regular Checks: Look at your water levels weekly, especially after heavy rains.
– Usage Awareness: Be mindful of how much water you’re consuming; if levels drop fast, consider using it more sparingly or getting a larger barrel.
– Garden Timing: Prioritize using rainwater for your thirstiest plants first to maximize resources.
By keeping an eye on your water levels, you can better control your garden’s watering schedule and make the most of your rainwater harvesting efforts!
One of the key rain barrel installation tips is to monitor water levels like a tiny reservoir: check levels weekly, especially after storms. Use a clear barrel or gauge so conservation is visible, not guesswork. If levels drop fast, adjust usage or upgrade to a larger barrel.
7. Prepare for Winter

As winter approaches, winterizing your rain barrel is crucial to avoid freezing and damage. Neglecting this can lead to cracks and leaks, leaving you without a functional system in spring.
Here’s how to prepare:
– Drain the Barrel: Completely empty it to prevent freezing water from causing damage.
– Disconnect: Remove any hoses or attachments to avoid damage during freezing temperatures.
– Store Indoors: If possible, keep your barrel in a garage or shed during the winter months.
Taking these steps means that when spring arrives, you can start collecting rainwater again without any issues!
How To Choose The Right Rain Barrel
Choosing the right rain barrel is key to successfully harvesting rainwater. With so many options available, it’s essential to consider a few factors to ensure you pick the best one for your needs. Here’s a guide to help you make an informed decision:
1. Size Matters
Consider how much rainfall you get in your area and the size of your garden. If you have a large garden and experience heavy rainfall, you might want a larger barrel—typically between 50 to 100 gallons. For smaller gardens or areas with limited rain, a smaller barrel will suffice. Keep in mind that a standard rain barrel holds about 55 gallons, which can be enough to water several plants.
2. Material Choice
Rain barrels come in different materials, including plastic, wood, and metal. Plastic barrels are lightweight and resistant to rust, making them a popular choice. Wooden barrels offer an aesthetic appeal but may require more maintenance. Metal barrels are durable but can be heavier and more expensive. Choose a material that not only fits your budget but also matches the look of your garden.
3. Design Features
Look for barrels with features that make them easier to use. Consider a design that includes a spigot for easy access to water. Some barrels also have built-in overflow valves to prevent spilling during heavy rain. A removable lid helps keep debris out while allowing easy access for cleaning. Make sure that the design matches your gardening habits and convenience needs.
4. Budget
Rain barrels can vary widely in price. Set a budget before shopping. Basic plastic barrels can start around $50, while decorative options or larger sizes can run up to $200 or more. Remember to factor in any additional costs for installation or accessories, like hoses or connectors, to complete your rainwater harvesting setup.
5. Aesthetic Appeal
Consider how the rain barrel will look in your garden. You want it to blend in with your outdoor space. Many manufacturers offer decorative barrels that mimic natural materials. Choose a color and style that complements your home and garden to enhance the overall appearance.
6. Warranty and Support
Before purchasing, check if the manufacturer provides a warranty or customer support. This can be crucial if you encounter any issues. A good warranty reflects the manufacturer’s confidence in their product and ensures you have recourse if something goes wrong.
Pro Tip: Always read reviews and ask for recommendations from fellow gardeners. This can give you deeper insights into the performance and reliability of different rain barrels. Check your local gardening community forums for tips and experiences with various brands and models. Taking the time to choose the right barrel will pay off in the long run!
8. Educate Yourself About Local Regulations

Before you start harvesting rainwater, it’s a good idea to familiarize yourself with local regulations. Some areas have specific guidelines regarding the setup and use of rain barrels, and knowing these can save you from potential fines.
Consider these steps:
– Research: Look up local conservation policies and rules about rainwater collection.
– Community Resources: Connect with gardening groups or city planners for guidance.
– Compliance: Ensure your setup meets any necessary permits or guidelines to avoid complications.
Understanding local regulations will empower you to make informed decisions and support your sustainable gardening journey!
Fun fact: in many cities, 30% of rain barrel setups fail inspections due to missing permits. A quick 20-minute check of local regulations and a chat with community resources keeps you compliant and avoids fines, one of our rain barrel installation tips. Knowledge is protection for your rainwater harvest.
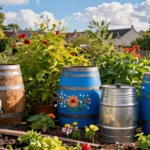
9. Make It Aesthetically Pleasing

Your rain barrel can be both functional and attractive! Consider how your barrel fits into your garden’s overall design. You can enhance its appearance with plants or paint it to suit your outdoor décor.
Here are some creative ideas:
– Plant Decor: Surround your barrel with flowering plants or climbing vines for added beauty.
– Custom Colors: Paint your barrel in bright colors or patterns that showcase your style.
– Privacy Screens: Use trellises or bamboo screens to create a natural look while hiding any unattractive features.
By making your rain barrel part of your garden’s aesthetic, you’ll be more inspired to use it and showcase your commitment to sustainable gardening!
Conclusion

Installing a rain barrel is an effective way to conserve water and support your gardening efforts. By following these nine tips, you can avoid common mistakes and set up a rainwater harvesting system that works for you. Embrace sustainable gardening practices, and enjoy the satisfaction of knowing you’re doing your part for the environment!
Engage with your community, share your experiences, and continue to find innovative solutions for a greener urban landscape.
Note: We aim to provide accurate product links, but some may occasionally expire or become unavailable. If this happens, please search directly on Amazon for the product or a suitable alternative.
This post contains Amazon affiliate links, meaning we may earn a small commission if you purchase through our links, at no extra cost to you.
Frequently Asked Questions
What are the essential rain barrel installation tips for an urban garden, and how can I avoid common mistakes?
Here are essential rain barrel installation tips for an urban garden to avoid common mistakes.
Start by selecting a barrel size that fits your downspout and irrigation needs, and place it on a sturdy, level stand to improve water pressure and prevent tipping.
Fit a fine mesh screen and a tight lid to block leaves and mosquitoes, and install a proper overflow to keep your foundation dry.
Use a downspout diverter so water moves cleanly into the barrel, and follow a DIY rain barrel setup that matches your space.
Regular rain barrel maintenance checks will extend life and ensure safe water for your plants.
This approach supports rainwater harvesting, garden water conservation, and sustainable gardening practices.
How do I choose the right rain barrel and avoid common installation mistakes?
Choosing the right rain barrel involves a few practical rain barrel installation tips to avoid common mistakes.
Look for UV stable materials, a capacity that fits your roof runoff, and a sturdy mounting option.
Ensure a secure lid with a fine screen to block debris and mosquitoes, and install a proper overflow to direct excess water away from your foundation.
Pair your choice with a thoughtful DIY rain barrel setup and planning for garden water conservation.
This simple approach supports rainwater harvesting and sustainable gardening practices.
What maintenance tasks keep rain barrels healthy across seasons?
Keeping your rain barrel in top shape is part of smart rain barrel installation tips in practice.
Start by shading the barrel and keeping the lid tight to prevent algae growth and mosquitoes.
Clean the interior and screens annually, rinse debris, and check seals for leaks.
Flush the system before the rainy season and winterize if you live in freezing climates.
Regular rain barrel maintenance helps ensure reliable rainwater harvesting and effective garden water conservation.
Can rain barrels support sustainable gardening and reduce city water waste?
Absolutely. A well installed rain barrel is a cornerstone of rainwater harvesting and garden water conservation in urban spaces.
Store water for drip irrigation, containers, and garden beds, especially during dry spells, to cut municipal water use and costs.
Pair your setup with mulching and efficient watering schedules for sustainable gardening practices and improved plant health.
Keep your system clean with a good screen, secure lids, and a proper rain barrel installation tips mindset.
What safety and DIY tips should I know when setting up a rain barrel in an urban space?
Urban rain barrel projects benefit from a stable stand, mosquito proof lids, and child or pet safety considerations.
Secure the barrel to resist tipping, route drainage away from walkways, and use a clear DIY rain barrel setup plan to stay organized.
Check local codes for rain barrel installations and ensure your system follows rain barrel maintenance guidelines for safety and reliability.
This approach aligns with rainwater harvesting and sustainable gardening practices.
![9 Essential Compost Bin Maintenance Tips [No Bad Smells]](https://huserie.com/wp-content/uploads/2026/04/9-Essential-Compost-Bin-Maintenance-Tips-No-Bad-Smells-150x150.webp)
![15 Stunning Inflatable Pool Deck Ideas [Make It Look Built In]](https://huserie.com/wp-content/uploads/2026/04/15-Stunning-Inflatable-Pool-Deck-Ideas-Make-It-Look-Built-In-150x150.webp)